

I've seen a lot of people asking questions about this, and how difficult it is, so I thought I'd do a guide since I had to put on new poly isos.
This is really an easy job, that I've done in my driveway with basic hand tools multiple times.
Obviously you'll start by taking the tire off. I do one side at a time, with the vehicle properly set up on a jackstand.
![Image]()
Next, take the brake rotor and caliper off. I do this by leaving the caliper on the rotor to make things faster. There are two 15mm bolts on the back side of the caliper that bolts onto the spindle.
![Image]()
Once you get the rotor off, make sure you rest it on something so it's not just hanging from the brake line. I just use a bucket.
![Image]()
Next up is the sway bar. I take the only the top nut off, again using a 15mm socket. You'll see a flat spot on the sway bar link, I grab this with a pair of pliers so it doesn't spin.
![Image]()
At this point, make sure you have a jack under the A arm, and slightly raise it to take the pressure off the strut bolts.
I didn't take a pic of this, but next you'll take off the two bolts that hold the strut onto the spindle. One side is a 21mm, and I'm not sure what the other side is,because I always use a wrench that I cut in half for another job so it doesnt have the size marked on it.
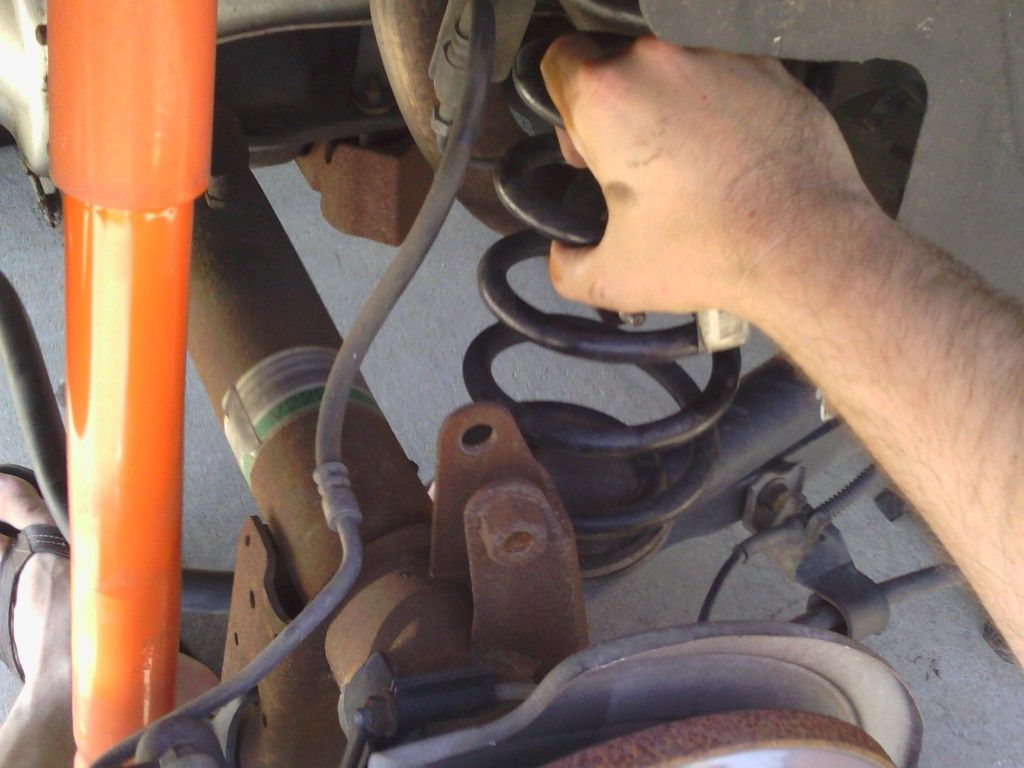
Once you get those 2 bolts off, you're ready to get the spring out. Slowly lower the jack, until its fully lowered. If you still have stock springs, they'll take a bit more work to get out. Push down on the Aarm, (I use my foot) and use a small pry bar to get the spring out. They are under some tension, but not really enough to go flying as some people say.
![Image]()
Now you're ready to re-install. Make sure the pigtail of the spring goes between the two drain holes.
![Image]()
Then, jack the a arm back up, guiding the sway bar endlink back into its hole, then reinstall all nuts and bolts in reverse order, put tire back on, do your other side, then step back and enjoy your new stance.
*Note- Anytime you disassemble your front end, or change the ride height, It's best to get it realigned. Take it to a reputable shop.
You'll also notice I left the tie rod ends connected. People will tell you that you can damage the ends by not taking them off, but Ive done this numerous times and they are fine. You will damage them by using a pickle fork type tool for sure, and I dont have the patience to bang on the spindle for hours, hoping that it drops free.
So that's it, how to change springs by using basic tools, in your driveway, by taking off 5 bolts per side in under an hour.
So go get dirty, no excuses!
This is really an easy job, that I've done in my driveway with basic hand tools multiple times.
Obviously you'll start by taking the tire off. I do one side at a time, with the vehicle properly set up on a jackstand.

Next, take the brake rotor and caliper off. I do this by leaving the caliper on the rotor to make things faster. There are two 15mm bolts on the back side of the caliper that bolts onto the spindle.

Once you get the rotor off, make sure you rest it on something so it's not just hanging from the brake line. I just use a bucket.

Next up is the sway bar. I take the only the top nut off, again using a 15mm socket. You'll see a flat spot on the sway bar link, I grab this with a pair of pliers so it doesn't spin.

At this point, make sure you have a jack under the A arm, and slightly raise it to take the pressure off the strut bolts.
I didn't take a pic of this, but next you'll take off the two bolts that hold the strut onto the spindle. One side is a 21mm, and I'm not sure what the other side is,because I always use a wrench that I cut in half for another job so it doesnt have the size marked on it.
Once you get those 2 bolts off, you're ready to get the spring out. Slowly lower the jack, until its fully lowered. If you still have stock springs, they'll take a bit more work to get out. Push down on the Aarm, (I use my foot) and use a small pry bar to get the spring out. They are under some tension, but not really enough to go flying as some people say.

Now you're ready to re-install. Make sure the pigtail of the spring goes between the two drain holes.

Then, jack the a arm back up, guiding the sway bar endlink back into its hole, then reinstall all nuts and bolts in reverse order, put tire back on, do your other side, then step back and enjoy your new stance.
*Note- Anytime you disassemble your front end, or change the ride height, It's best to get it realigned. Take it to a reputable shop.
You'll also notice I left the tie rod ends connected. People will tell you that you can damage the ends by not taking them off, but Ive done this numerous times and they are fine. You will damage them by using a pickle fork type tool for sure, and I dont have the patience to bang on the spindle for hours, hoping that it drops free.
So that's it, how to change springs by using basic tools, in your driveway, by taking off 5 bolts per side in under an hour.
So go get dirty, no excuses!


")


